1.
This tutorial is based on Photoshop CS6 tools that can be found in any previous versions.
First of all, make sure you are working on a new layer.
This tutorial is based on Photoshop CS6 tools that can be found in any previous versions.
First of all, make sure you are working on a new layer.

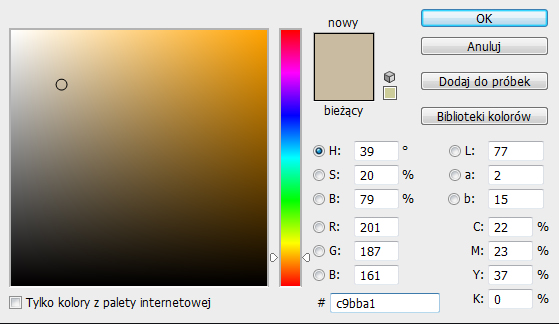
2.
From the color panel choose the color of your half pad. For the basic ecru one, grab #c9bba1.
From the color panel choose the color of your half pad. For the basic ecru one, grab #c9bba1.

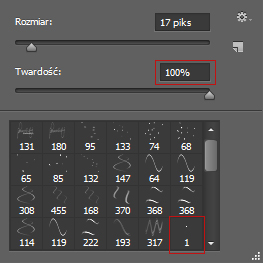
3.
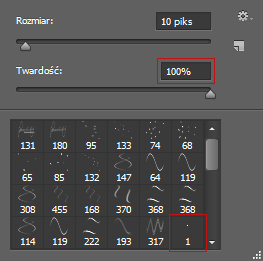
Grab the Brush Tool (B) and set it's size matching the width of your pad and set it's hardness to 100%.
Grab the Brush Tool (B) and set it's size matching the width of your pad and set it's hardness to 100%.

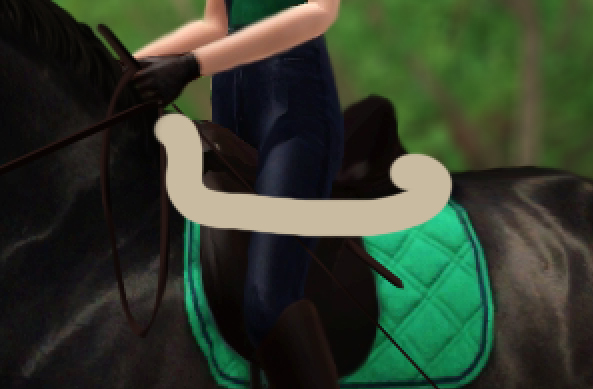
4.
Draw the skeleton of your half pad.
Draw the skeleton of your half pad.

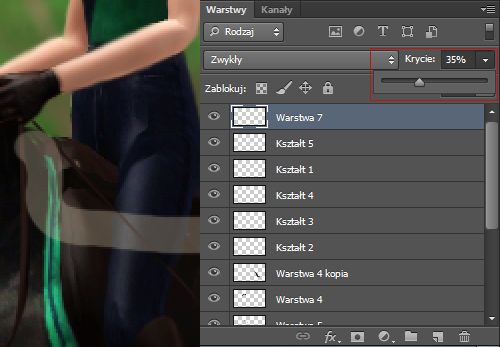
5.
Select your layer and change its opacity to 35%.
Select your layer and change its opacity to 35%.

6.
Grab the Ereaser Tool (E), set its size a bit smaller than the brush and hardness to 100%.
Grab the Ereaser Tool (E), set its size a bit smaller than the brush and hardness to 100%.
Erease the parts of your half pad that should not be visible.

7.
Get the opacity back to 100%.
Get the opacity back to 100%.
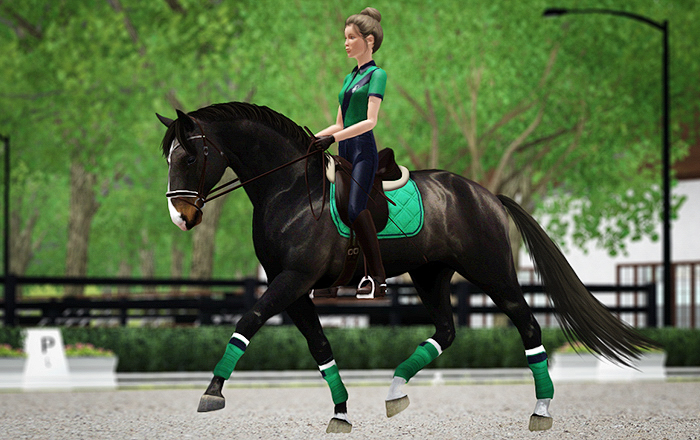
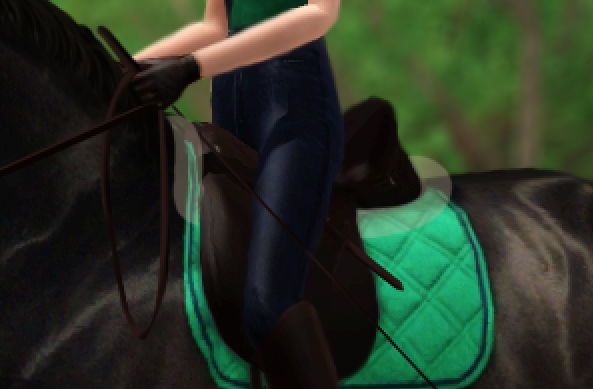
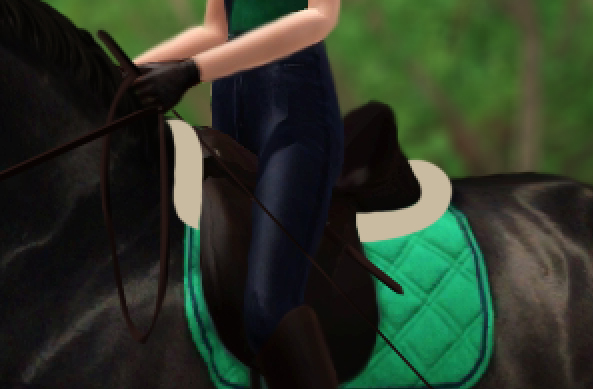
Your half pad skeleton is done, now it should look like this.

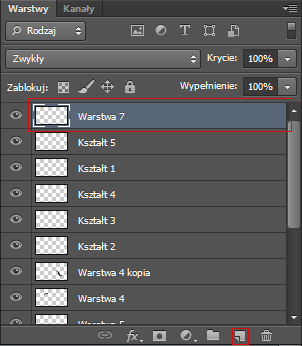
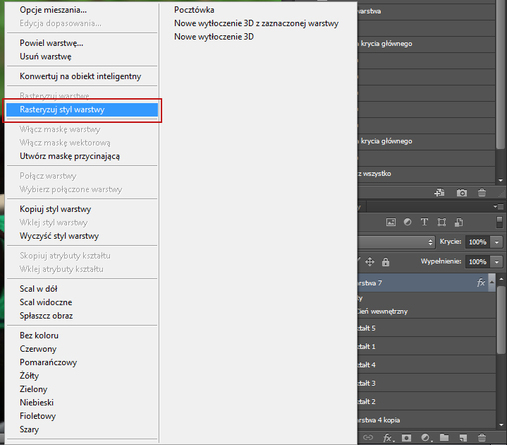
8.
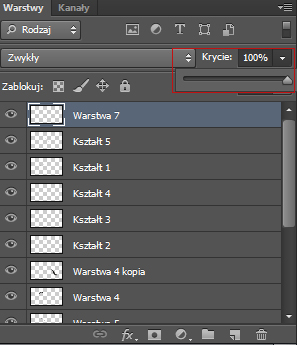
Right click the layer with your half pad.
Choose "Blending options" (usually it's the first one on the list).
Right click the layer with your half pad.
Choose "Blending options" (usually it's the first one on the list).
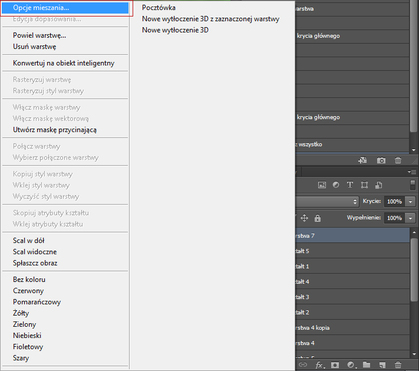
Now choose the Inner shadow.
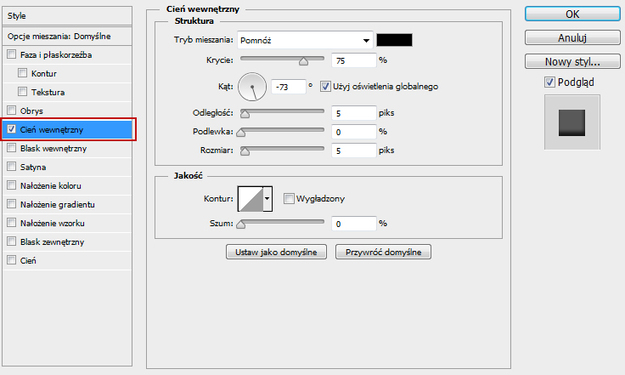
Take a look at your picture and decide where the light and shadow goes. Then just set the proper angle for Inner shadow, to create a shades for your half pad.
You can also play with other sliders to see how they work. You can change the size and opacity of shades.

9.
Right click the layer with your half pad.
Right click the layer with your half pad.
Choose "Rasterize layer style".
Now your layer will "loose" the effects in a layer panel.
Don't worry, they are visible, they are just hidden because we need to add another shadow.
Don't worry, they are visible, they are just hidden because we need to add another shadow.

10.
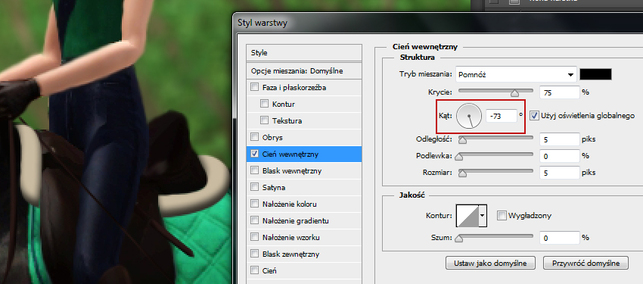
Right click your layer and again choose "Blending options" (just like in step #8).
Now select Drop shadow at the end of your list.
Right click your layer and again choose "Blending options" (just like in step #8).
Now select Drop shadow at the end of your list.
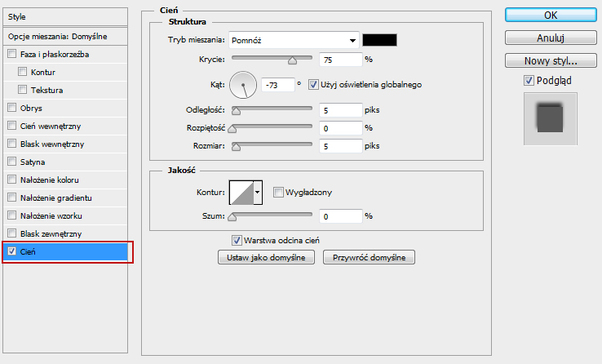
It has set its angle to the previous one you have used for Inner shadow. Just change the angle to complete oposite.
So if mine was -73, I will set mine to something around 113.
Also make sure to play with other sliders, especially with the Distance (first slider) to make it a bit closer.
So if mine was -73, I will set mine to something around 113.
Also make sure to play with other sliders, especially with the Distance (first slider) to make it a bit closer.


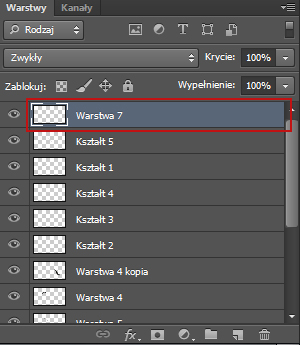
11.
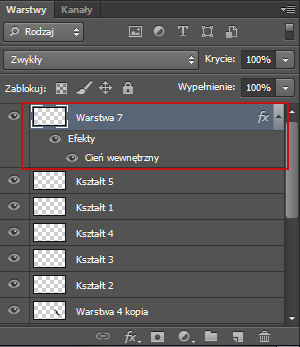
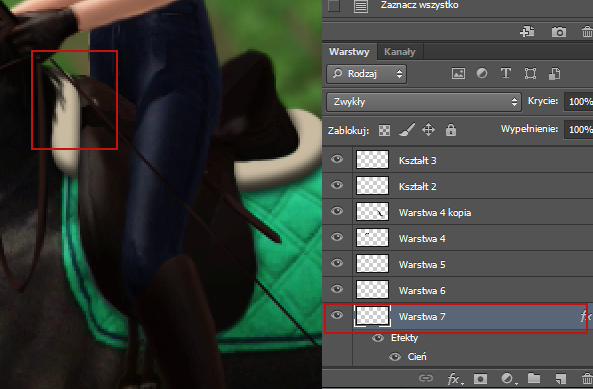
Now just grab the layer on your panel and move it to be at the bottom of other layers.
It's just because you want other thinkgs (like mane and whip) to be visible at the top.
Now just grab the layer on your panel and move it to be at the bottom of other layers.
It's just because you want other thinkgs (like mane and whip) to be visible at the top.

12.
Well done! Your sheepskin half pad is finished.
Well done! Your sheepskin half pad is finished.