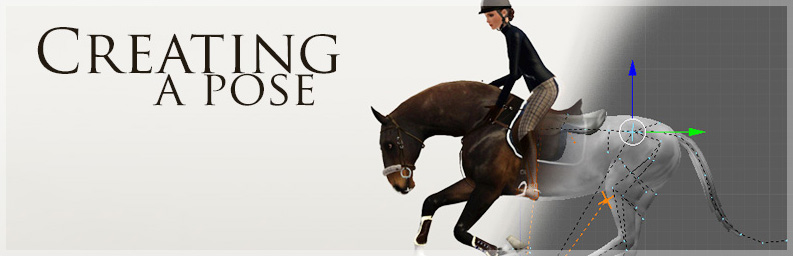
1.
First you need to download few important things.
This tutorial is based on Blender. Choose one of the following links do download for Windows 32 or 64 bit.
First you need to download few important things.
This tutorial is based on Blender. Choose one of the following links do download for Windows 32 or 64 bit.


Now let's download a tool that lets you export animations and save your poses into packages.

To make sims animations work in Blender, you need to download the animations pack.
After downloading - don't unzipp it!

Now you need to download rigs. Rigs are models of horse, young adult sim, kids, dogs, kittens etc. Everything is included in rar file.
Unzip the folder after downloading using WinRAR or any other program for archives.

Phew. No more downloads. Ever again.
Create a folder to put everything inside so you won't spend hours on searching for files during creating your first pose.

2.
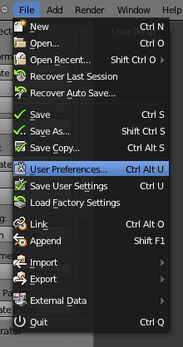
Open Blender. Go to File > User Preferences.
Open Blender. Go to File > User Preferences.
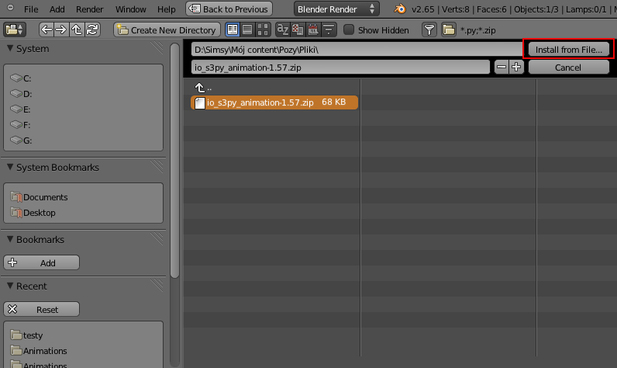
In the pop-up window go to "Addons" tab and click "Install from File" at the bottom.
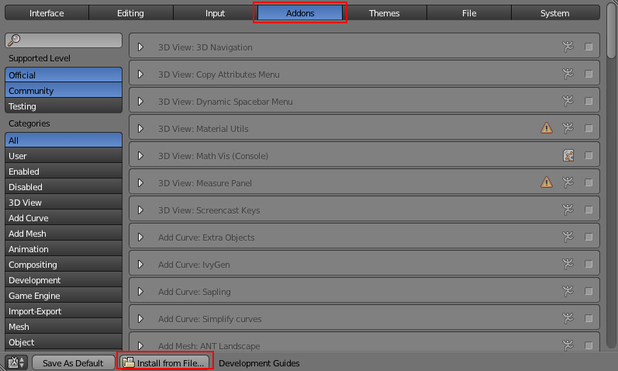
Go to your folder and choose io_s3py_animation-1.57.zip file.
Click it once and it will highlight in orange. Then click "Install from File".
Click it once and it will highlight in orange. Then click "Install from File".
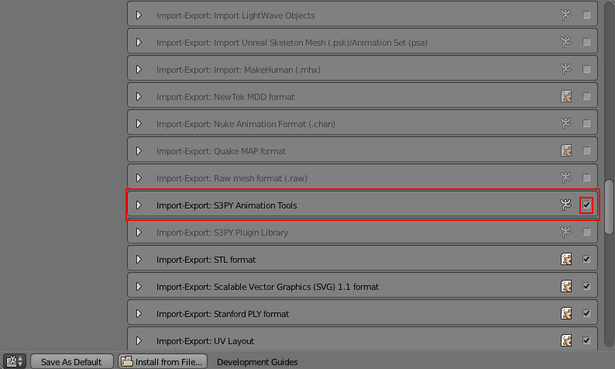
You will go back to "Addons" section again. Scroll down and find "Import-Export: S3PY Animation Tools" and check the tiny square at right. Click "Save as Default" and close the window.
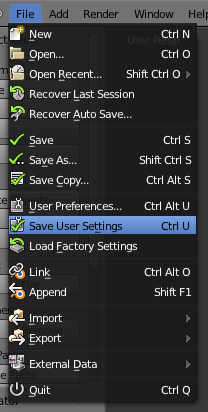
Now just go to File > Save User Settings.

3.
Before we continue, you need to know what are the shortcuts for a specific model.
af & am - female and male sim (you can create male pose working with female rig too)
ac - adult cat
ad - adult dog
al - adult little dog
ab - deer model (what?)
cc - kitten
ch - foal
cl - little dog puppy
cu - child sim
pu - toddler

4.
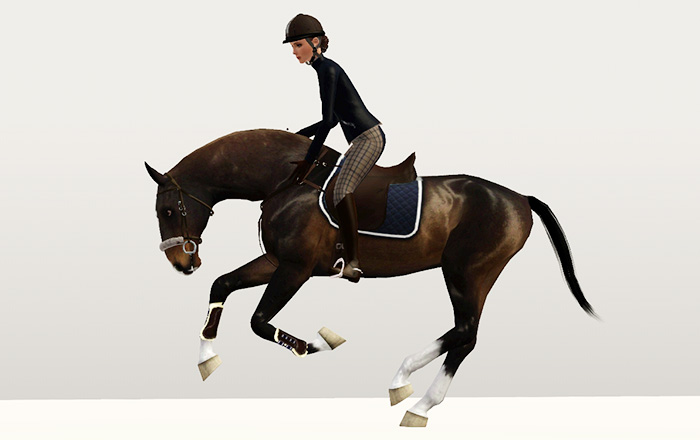
I will show you how to create a pose for sim and horse. First we will pose the horse.
Go to File > Open
I will show you how to create a pose for sim and horse. First we will pose the horse.
Go to File > Open
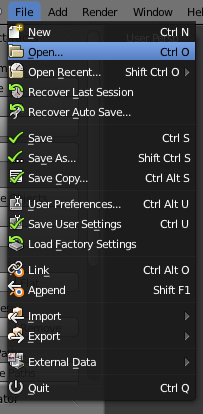
Go to Rigs you have downloaded and open "ahRig.blend".
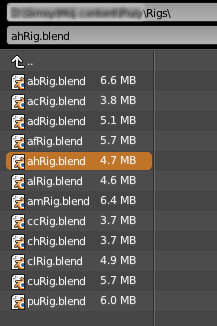
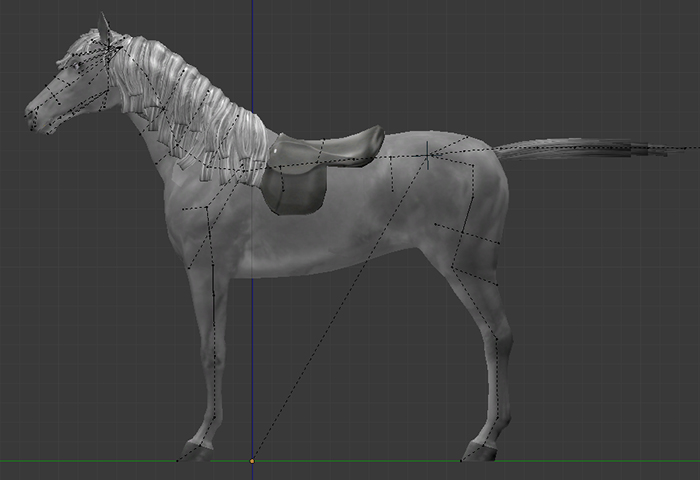
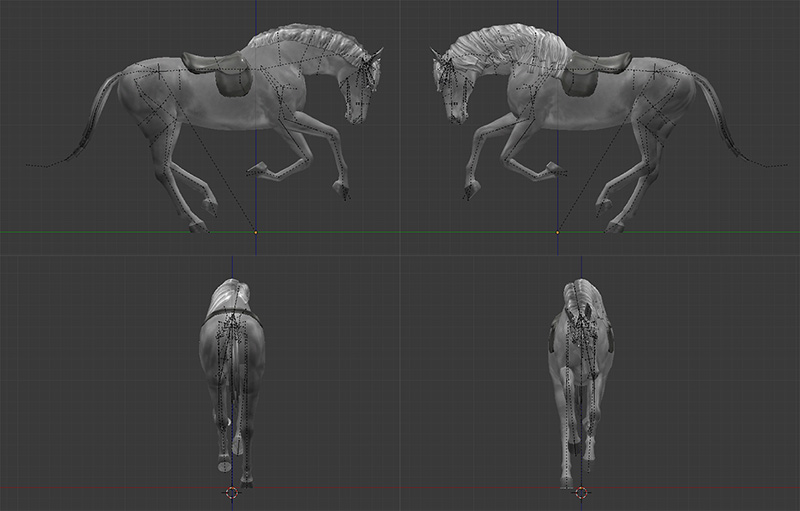
And there it is! Your horse model.

5.
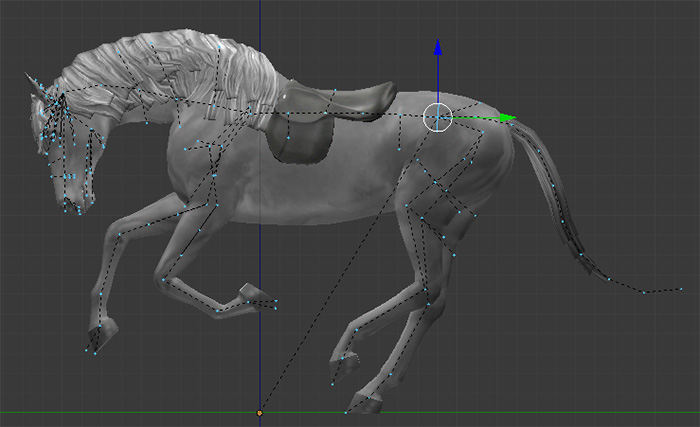
Now you need to learn how to work with your model.
Click third mouse button (SCROLL) to rotate. You can also push "ALT" to set your model in straight position depending on the angle.
Hold SHIFT and click SCROLL to move model around.
Move SCROLL up and down to zoom in or out.
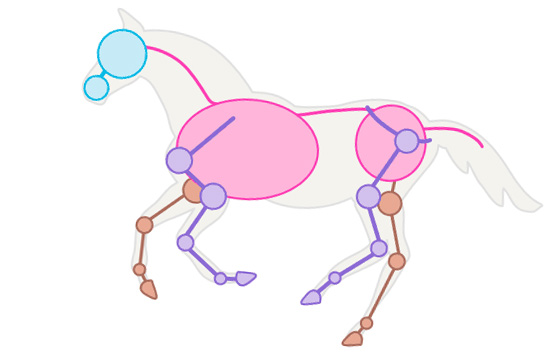
RIGHT CLICK one of black points on your model to select it.
Now you need to learn how to work with your model.
Click third mouse button (SCROLL) to rotate. You can also push "ALT" to set your model in straight position depending on the angle.
Hold SHIFT and click SCROLL to move model around.
Move SCROLL up and down to zoom in or out.
RIGHT CLICK one of black points on your model to select it.
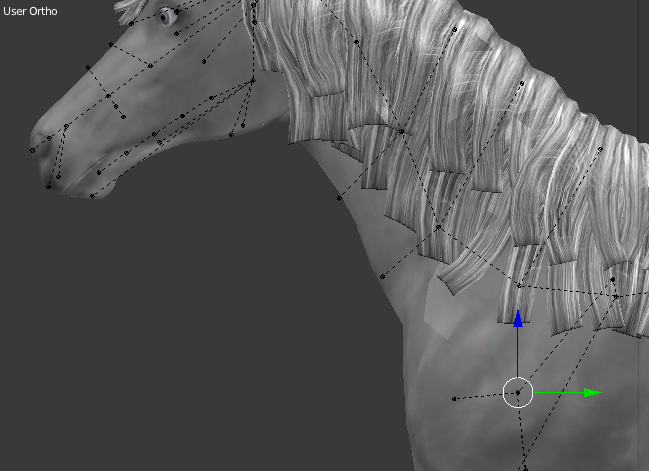
Visible arrows let you move specific point (with rest connected) into many directions.
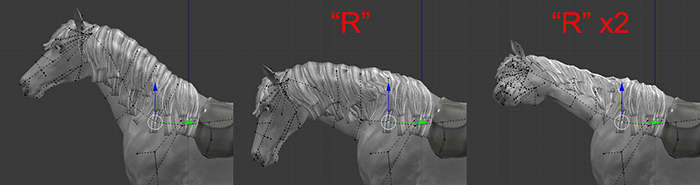
Click "R" and move your mouse around to move the point. Click "R" once again to rotate the point moving your mouse in any directions.
Click "R" and move your mouse around to move the point. Click "R" once again to rotate the point moving your mouse in any directions.
As you can see your horse model has many points. Work with most of them to gain more realistic pose.

6.
Go to Google and look for a reference picture. It's always good to have one, especially when you begin to work with Blender and posing.
You can use photos, pictures and drawings. I found a great one for the beginners.
Go to Google and look for a reference picture. It's always good to have one, especially when you begin to work with Blender and posing.
You can use photos, pictures and drawings. I found a great one for the beginners.

7.
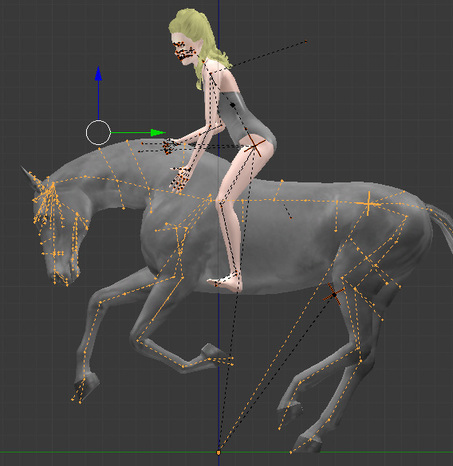
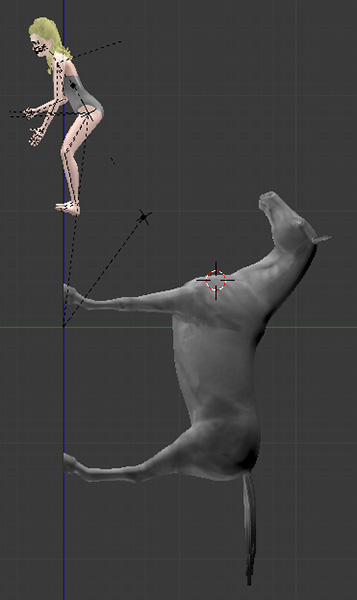
Now it's time to play with a rig! Move the points, rotate them and don't forget to keep the realism.
I have modified the pose a bit, because I have made up my mind to do a pose where rider praises a horse after a jump.
Now it's time to play with a rig! Move the points, rotate them and don't forget to keep the realism.
I have modified the pose a bit, because I have made up my mind to do a pose where rider praises a horse after a jump.

8.
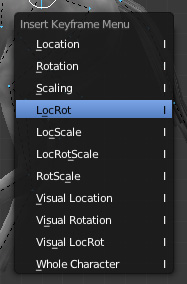
When you are done, click "A" twice. All points should highlight in blue.
When you are done, click "A" twice. All points should highlight in blue.
Now click "I" and from a list choose "LocRot". This will block your points before saving.

9.
Time to save and export our animation.
First you need to save your project. Go to File > Save As.
Time to save and export our animation.
First you need to save your project. Go to File > Save As.
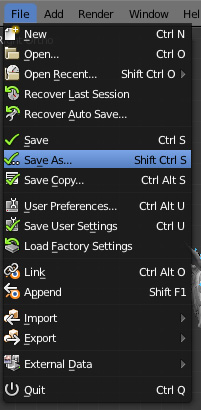
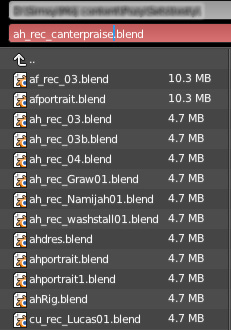
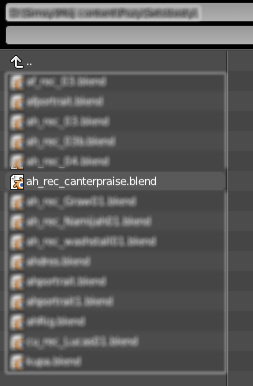
Name your project. It doesn't really matter how you name it, but I reccomend naming it leaving "ah" and adding an information of this pose. I'm saving mine as "ah_rec_canterpraise.blend". Type whatever you want and click "Save Blender File".
Now you will export sims animation. This file will be used to create a package file of a pose.
Go to right panel to Scene section. Click "Save CLIP".
Go to right panel to Scene section. Click "Save CLIP".
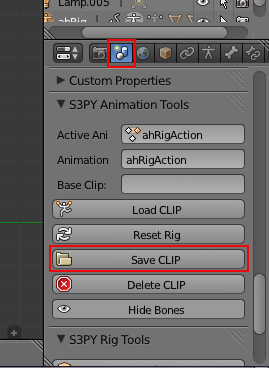
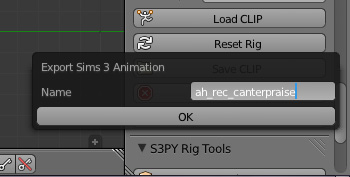
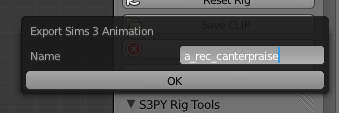
Now it's really important to give the pose a correct name. Depending on a rig you work with you need to add a correct suffix! For horses, type "ah", then name your pose. I use my prefix naming too keep my poses similiar. When you are done, click OK.
IMPORTANT! Don't change anything here!

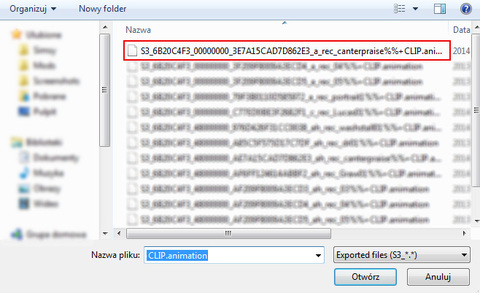
Select destination folder and save your animation.

10.
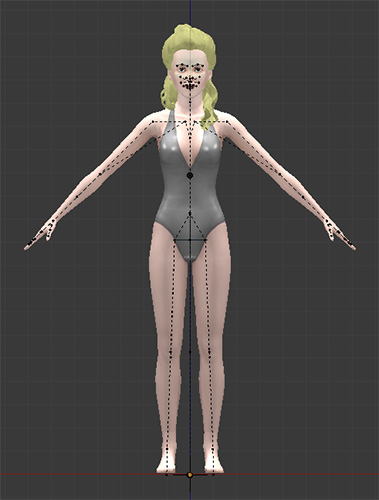
Time for a sim. Go to File > Open and choose adult sim rig called "afRig.blend".
Time for a sim. Go to File > Open and choose adult sim rig called "afRig.blend".
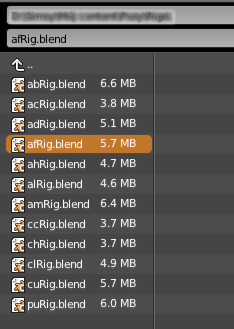
Well, she's not my type.

11.
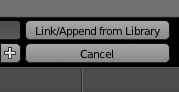
Because you don't want to guess where your sim should be placed, go to File > Append.
Because you don't want to guess where your sim should be placed, go to File > Append.

Search for saved horse blend file.
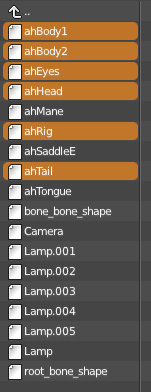
Next choose the folder called "Object".
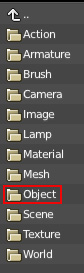
Blender will show you a list of objects to choose.
Choose only the following:
Choose only the following:
And click "Link/Append from Library".
You will notice an "orange" horse. The orange color will dissapear when you start to pose your sim.


12.
When you are done, right click the sim and click "A" twice. LocRot animation.
Now right click the horse once. It will highlight in orange again.
When you are done, right click the sim and click "A" twice. LocRot animation.
Now right click the horse once. It will highlight in orange again.
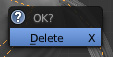
Click "Del" (Delete key) and Delete horse.
Even I'm probably miles away from you I hear your screaming.
"Mother of Blender, what is that?!"
Yeah, well, I have no idea what has just happen. Buuut it happens all the time! And noone knows why. Fortunately this floating horse is friendly and won't bother us in creating the pose. Leave him, let him live his Blender life.
"Mother of Blender, what is that?!"
Yeah, well, I have no idea what has just happen. Buuut it happens all the time! And noone knows why. Fortunately this floating horse is friendly and won't bother us in creating the pose. Leave him, let him live his Blender life.

13.
Time to save sim pose.
Go to File > Save As and name your pose. When done click "Save As Blender File".
Time to save sim pose.
Go to File > Save As and name your pose. When done click "Save As Blender File".

Now, same as with horse, go to Scene section and click Save Clip. Name your pose starting with "a_". This is the proper suffix for human poses.
Close Blender.

14.
Animations are ready to be exported to package files.
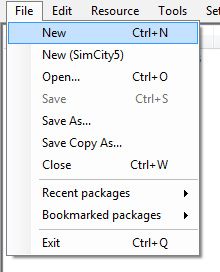
Open s3pe program. Go to Resource > Import > From file
Animations are ready to be exported to package files.
Open s3pe program. Go to Resource > Import > From file

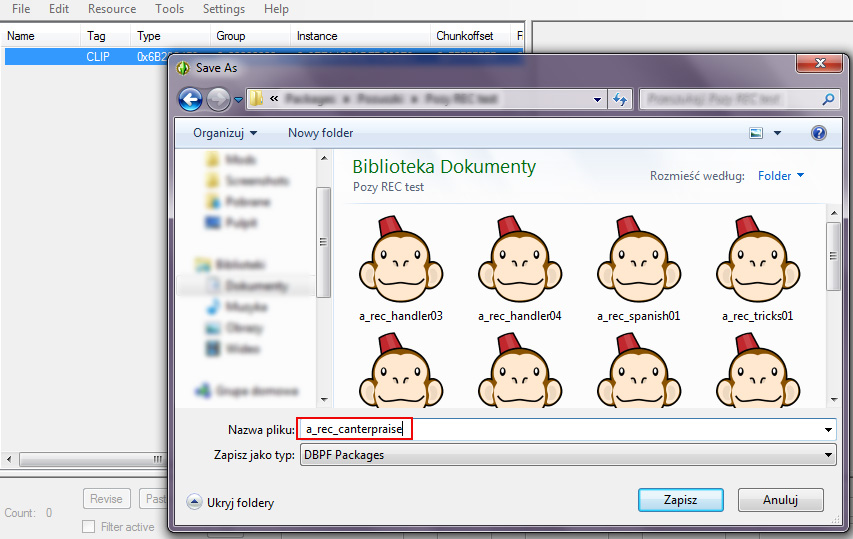
Choose human animation file, in my case it's "a_rec_canterpraise.CLIP".
Copy the pose name.
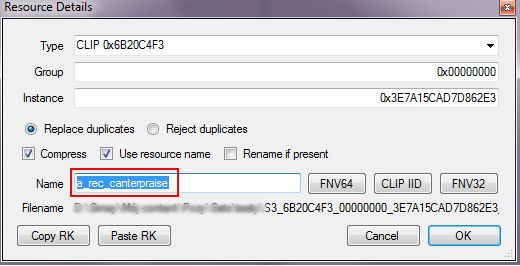
Uncheck "Use resource name".

Click OK. You will notice a line with some strange numbers.

Go to File > Save As. Now paste the pose name to a file name. It will be automatically saved as package file. Choose the destination. I save package files directly to "Mods > Packages > Single poses" folder :-)
Go to File > New.
Repeat all steps for horse clip file.
If you haven't saved packages in Mods/Packages move them there.
Now turn on the game and use Pose Player by "Pose by name", type your poses names ("ah_rec_canterpraise" and "a_rec_canterpraise") and test them. If you followed my steps both will work perfectly.
If you haven't saved packages in Mods/Packages move them there.
Now turn on the game and use Pose Player by "Pose by name", type your poses names ("ah_rec_canterpraise" and "a_rec_canterpraise") and test them. If you followed my steps both will work perfectly.