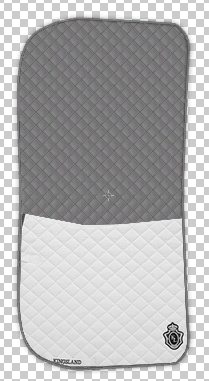
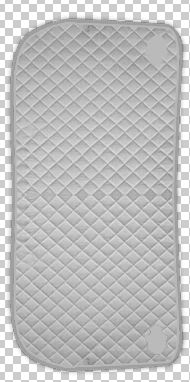
1.
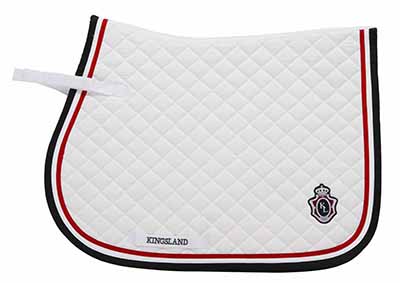
Choose your pad. Find a picture where the item will be shown from one side. It's easier to work with an image like this.

2.
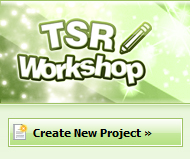
Now we need to get the tool to create our pad. The program we need is TSR workshop. Visit www.thesimsresource.com and register to download TSRW. Go to Create > Get TSR Workshop and click "Download latest version". Install and open program.
Now we need to get the tool to create our pad. The program we need is TSR workshop. Visit www.thesimsresource.com and register to download TSRW. Go to Create > Get TSR Workshop and click "Download latest version". Install and open program.


3.
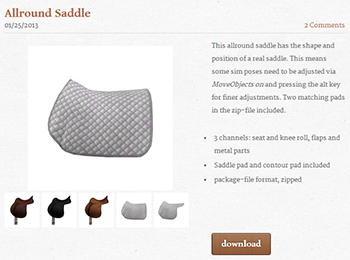
Now you need to download the base of a pad. Visit Dana's Lakeside Saddlery to download one of three bases. Choose dressage, jumping or allround saddle pad you prefer to work on. In this tutorial we will be working on allround saddle pad.
Now you need to download the base of a pad. Visit Dana's Lakeside Saddlery to download one of three bases. Choose dressage, jumping or allround saddle pad you prefer to work on. In this tutorial we will be working on allround saddle pad.

4.
Create a separate folder for you project. Unzipp saddle pad file you have just downloaded and choose one of the files included. Move or copy it to the new folder.
Create a separate folder for you project. Unzipp saddle pad file you have just downloaded and choose one of the files included. Move or copy it to the new folder.


5.
Now it's time to start creating your pad. Go to TSR Workshop and click "Create New Project".
Now it's time to start creating your pad. Go to TSR Workshop and click "Create New Project".

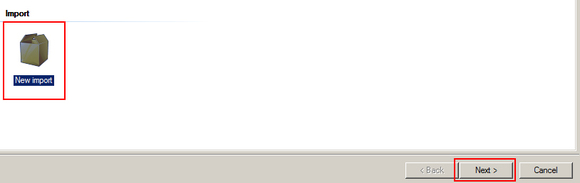
6.
Choose "New import" and click "Next"
Choose "New import" and click "Next"

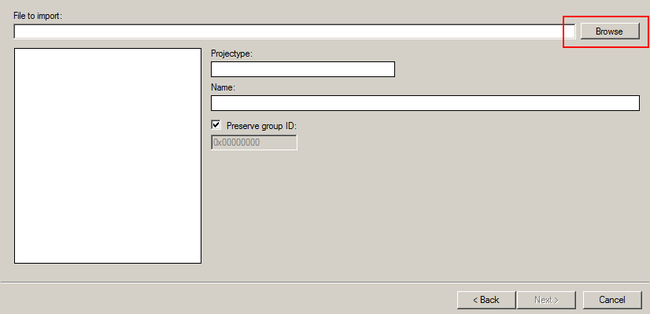
7.
In the next window we choose "Browse".
In the next window we choose "Browse".

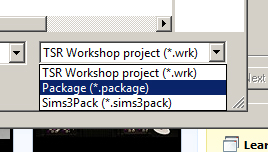
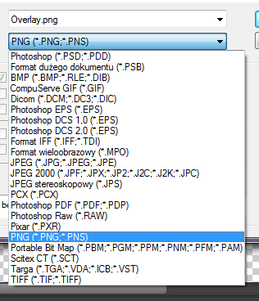
8.
Go to the folder with a saddle pad from Lakeside Ranch and choose the right format from the list below. In this case your base is packed in package file, so choose "Package".
Go to the folder with a saddle pad from Lakeside Ranch and choose the right format from the list below. In this case your base is packed in package file, so choose "Package".

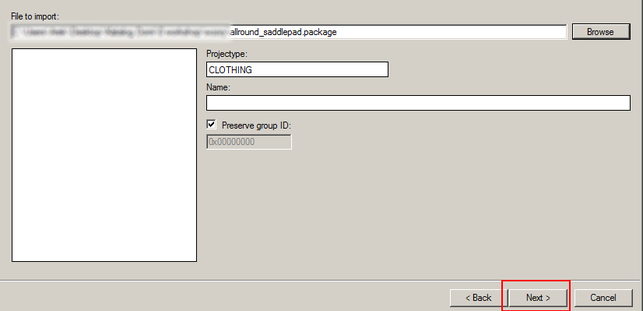
9.
In the next window don't change anything and just click "Next".
In the next window don't change anything and just click "Next".

10.
Now you need to name your item. I use special naming for my creations like "REC Pad 001". You can call it as you wish.
Remember that each creation needs a different name, because if two would be called the same only one will appear in game.
The description is useless for you, but you can still write something there.
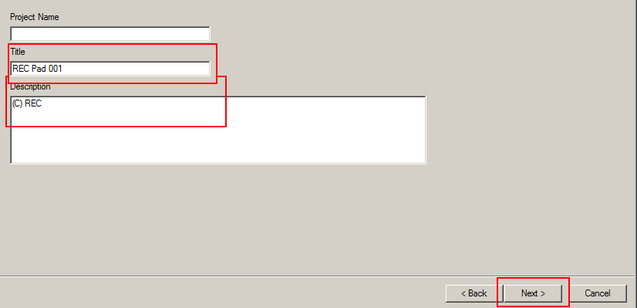

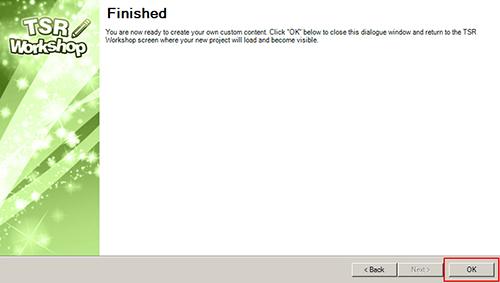
11.
Great! You have completed first step.
Great! You have completed first step.

12.
When your project is loaded, go to "Texture" tab which is located on the right side of the window.
When your project is loaded, go to "Texture" tab which is located on the right side of the window.
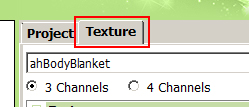

13.
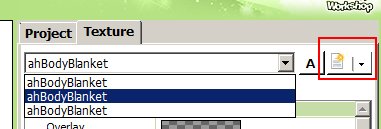
Here you find a list. This list includes versions of your pad, which are visible in CAS as one object in few color/design versions.
Because we are focusing on creating one object, choose one and remove the other two by clicking "Delete", located in the paper icon highlighted in red on the picture below.

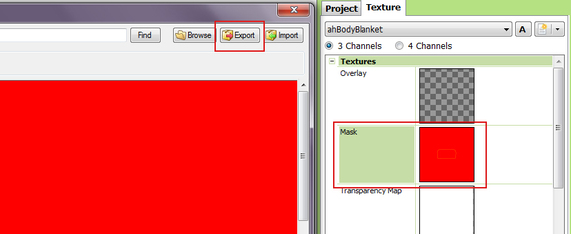
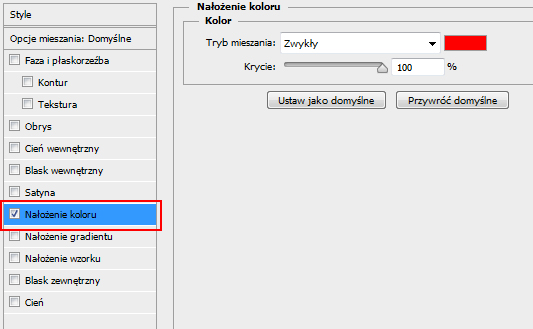
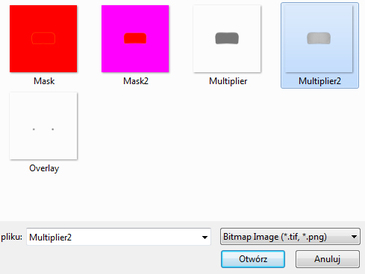
14.
On the beginning of your creating journey you are interested in three positions in the texture menu on the right.
On the beginning of your creating journey you are interested in three positions in the texture menu on the right.
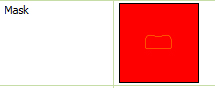
- layer "Mask" - the layer where the colors red, yellow and purple (or sometimes red, green and blue) decide which parts of the pad have a specific color. But I will explain you more later.
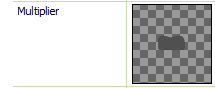
- layer "Multiplier" - this layer includes the overall design of your pad
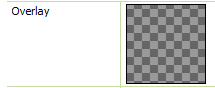
- layer "Overlay" - this layer contains those parts of a design that won't change, eg. logos, trimmers, zippers, buttons etc.

15.
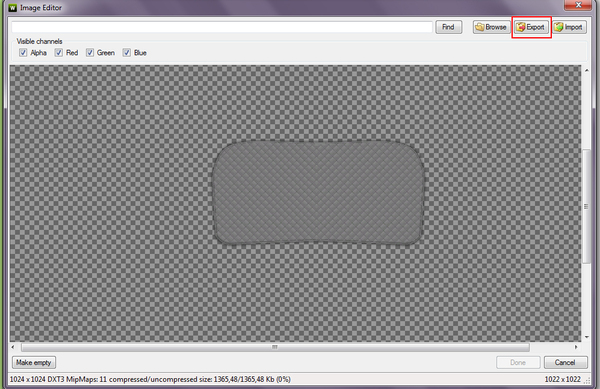
Click twice on "Multiplier" layer and enlarge the pop-up window that showed up.
On the bottom right corner you will see "Export" button. Click it to save the image in your destination folder.
Click twice on "Multiplier" layer and enlarge the pop-up window that showed up.
On the bottom right corner you will see "Export" button. Click it to save the image in your destination folder.

16.
Name your layer however you like. I name them "Multiplier", just like TSR does.
Change file extension to PNG file!
Name your layer however you like. I name them "Multiplier", just like TSR does.
Change file extension to PNG file!


17.
Now we open graphic program. This tutorial will be based on Photoshop CS6 tools (unfortunately in polish language), but I'm 100% sure all of them can be found in older PS versions and even in GIMP.
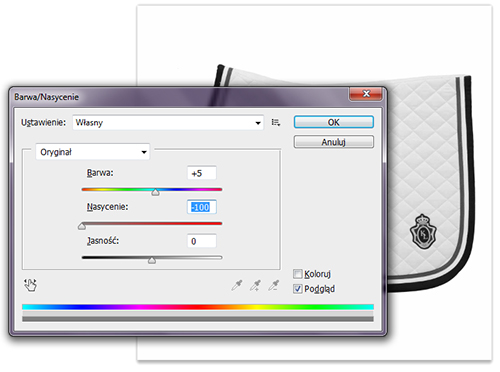
Open your selected pad picture and click CTRL + ALT + U or choose Image > Adjustments > Hue/Saturation.
You need to desaturate pad picture, so set the saturation to -100.
Now we open graphic program. This tutorial will be based on Photoshop CS6 tools (unfortunately in polish language), but I'm 100% sure all of them can be found in older PS versions and even in GIMP.
Open your selected pad picture and click CTRL + ALT + U or choose Image > Adjustments > Hue/Saturation.
You need to desaturate pad picture, so set the saturation to -100.

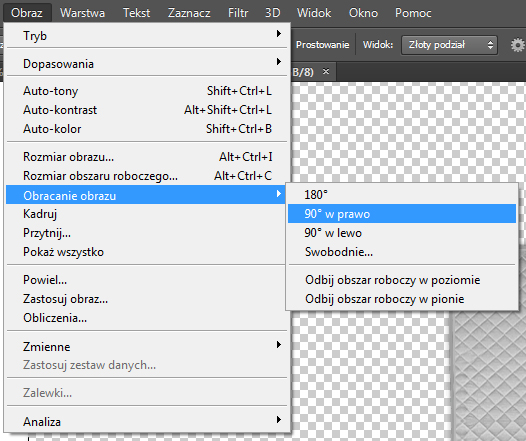
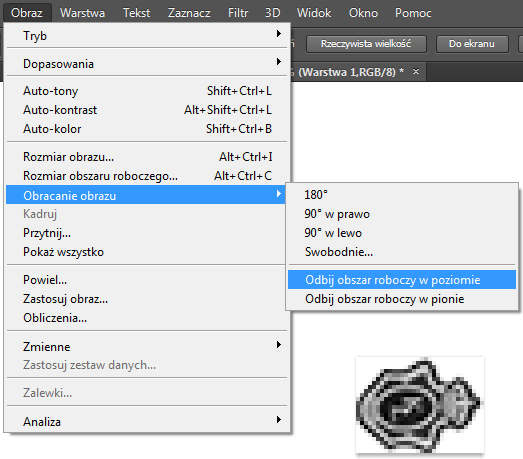
18.
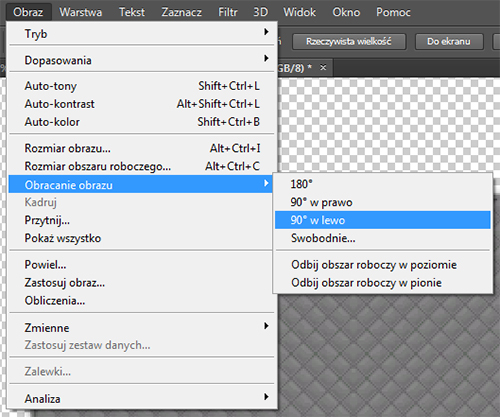
Open "Multiplier.png" and select Image > Image Rotation (or Transform) > Rotate left 90°
It's much easier to work with rotated image.
Open "Multiplier.png" and select Image > Image Rotation (or Transform) > Rotate left 90°
It's much easier to work with rotated image.

19.
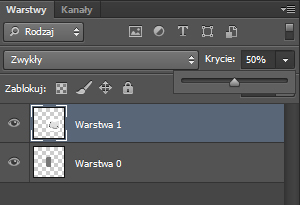
Go to pad picture, select all, copy and paste to "Multiplier" file.
Then go to layers window, choose your layer with a pad and change the opacity to 50%. It would be easier to suit it to your base.
Go to pad picture, select all, copy and paste to "Multiplier" file.
Then go to layers window, choose your layer with a pad and change the opacity to 50%. It would be easier to suit it to your base.

20.
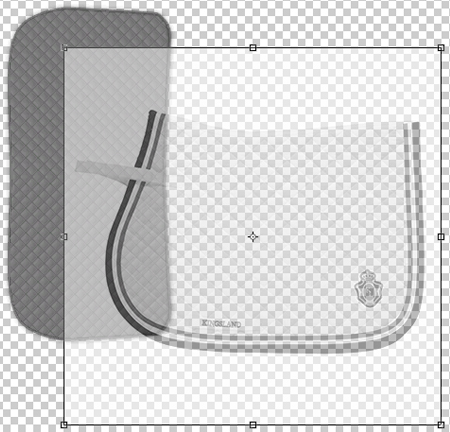
Now you need to adjust the size of a pad to suit it. Click CTRL + T (Free Transform), hold Shift (it's very important to do it, because you won't change the proportions) and move one of the corners to change the size of the pad.
Now you need to adjust the size of a pad to suit it. Click CTRL + T (Free Transform), hold Shift (it's very important to do it, because you won't change the proportions) and move one of the corners to change the size of the pad.

21.
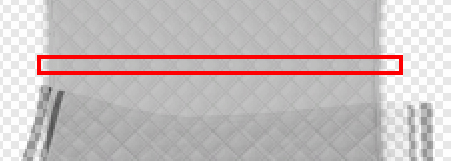
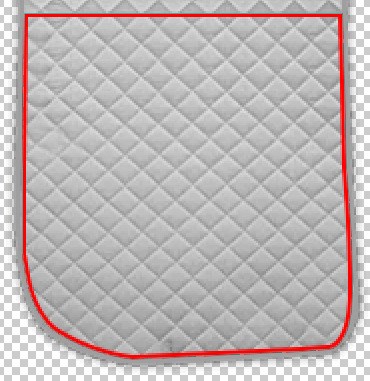
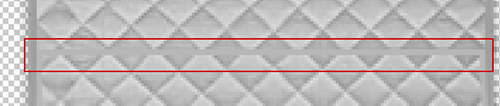
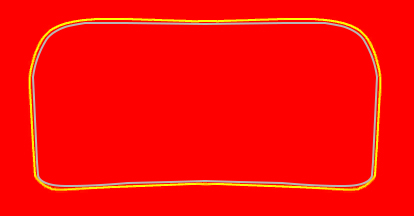
You need to see where is the middle of Dana's pad. I have drawn you a red rectangle to show you where it's located,
It's important to fill all the space with a texture. You don't need to do it with you pad now, you can use Stamp Tool to fill it.
We'll do that later.
Oh, and don't think about the logo now.

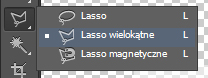
22.
Select your favourite selecting tool. You need to remove useless parts of your pad.
My tool is Polygonal Lasso.
Select your favourite selecting tool. You need to remove useless parts of your pad.
My tool is Polygonal Lasso.

23.
Select the area from where trimmer meets texture. Everything what's inside is your texture.
Select the area from where trimmer meets texture. Everything what's inside is your texture.
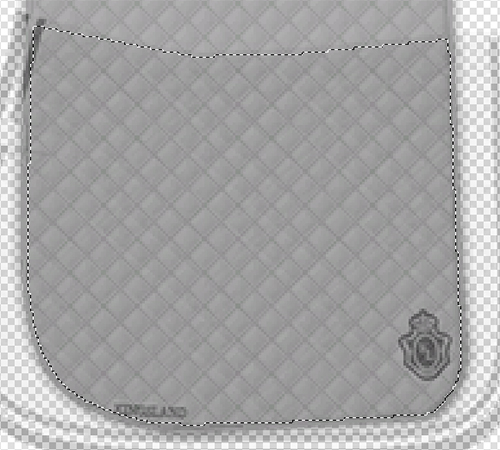

24.
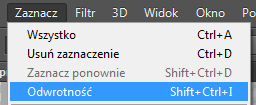
Now click SHIFT + CTRL + I or go to Select > Inverse to inverse selection. Now everything outside is selected. Click CTRL + X to remove it.
Now click SHIFT + CTRL + I or go to Select > Inverse to inverse selection. Now everything outside is selected. Click CTRL + X to remove it.

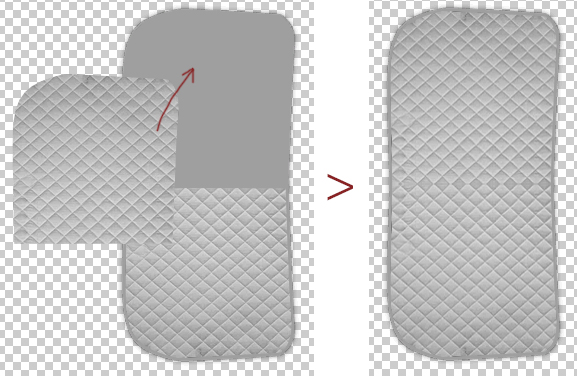
25.
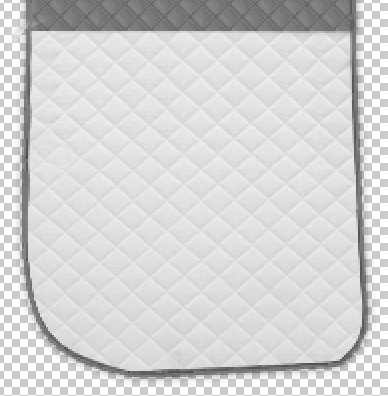
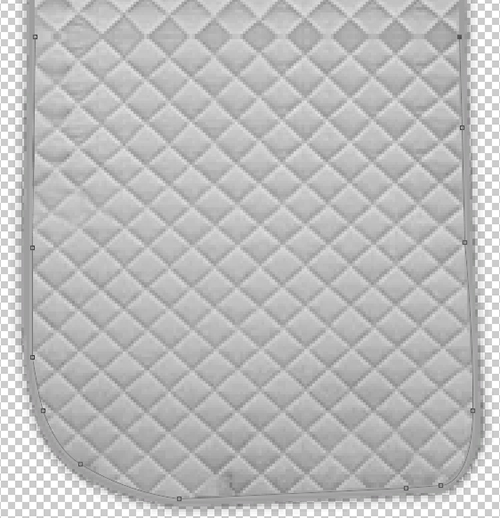
Go back to leyer window on right and select opacity to 100%.
Your image should look similiar to this. As you can see you are missing some parts at the top of left side of a pad. Also you need to remove the logo and Kingsland sign.
Go back to leyer window on right and select opacity to 100%.
Your image should look similiar to this. As you can see you are missing some parts at the top of left side of a pad. Also you need to remove the logo and Kingsland sign.

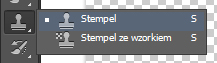
26.
Click S or choose the Stamp Tool from tools menu.
If you don't know how Stamp Tool works, visit youtube for a tutorial.
Click S or choose the Stamp Tool from tools menu.
If you don't know how Stamp Tool works, visit youtube for a tutorial.

27.
Clone pad's texture to the place where left and right side of the pad meet and remove all unwanted stuff.
Clone pad's texture to the place where left and right side of the pad meet and remove all unwanted stuff.

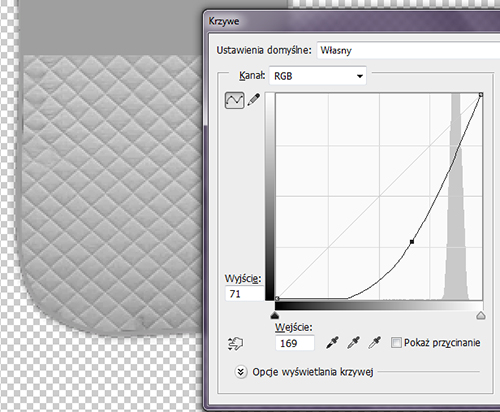
28.
Now it's time to set the right contrast and color.
Click CTRL + M to open Curves window. If you don't know how curves work, please find a tutorial.
Remember that your Multiplier needs to be grey - the ligther it is, the lighter colors you can set in game. But never make it too bright!
Play with curves to see how they work and to set a nice color of grey.

29.
Now select all (CTRL + A), copy and paste pad layer to a new file.
Go to Image > Image Rotation (or Transform) > Flip Vertical. Copy flipped image and paste it back to "Multiplier.png".
Now select all (CTRL + A), copy and paste pad layer to a new file.
Go to Image > Image Rotation (or Transform) > Flip Vertical. Copy flipped image and paste it back to "Multiplier.png".
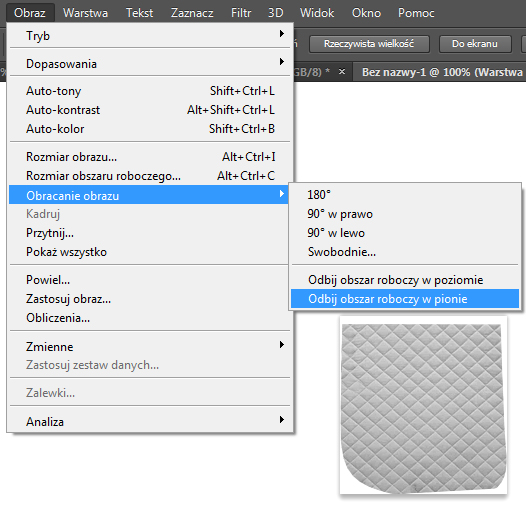

30.
You need to move pasted image to a right place - the other side of your pad.
You need to move pasted image to a right place - the other side of your pad.

31.
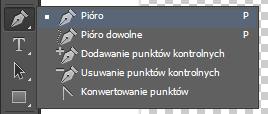
Your basic texture is done. You can skip to #40, but I recommend to do the trimming so you can learn how to do it.
Let's do the trimming! Choose Pen Tool by clicking P or selecting it in tools menu.
Your basic texture is done. You can skip to #40, but I recommend to do the trimming so you can learn how to do it.
Let's do the trimming! Choose Pen Tool by clicking P or selecting it in tools menu.
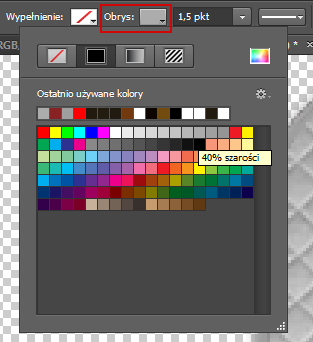
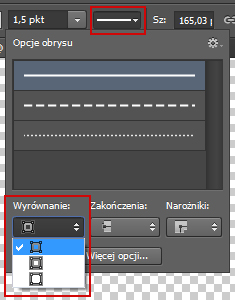
On the top you need to select "Shape".
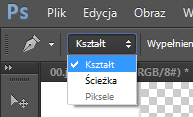
Next you need to set the following:
- Filling to none (an image with red line)
- Stroke color to red from the sample colors shown on the window, so you will see how your trimming goes
- Stroke size to 1,5 pixels
- Straight line (last picture on the right)
- Filling to none (an image with red line)
- Stroke color to red from the sample colors shown on the window, so you will see how your trimming goes
- Stroke size to 1,5 pixels
- Straight line (last picture on the right)

32.
Now you will create the shape of trimming. If you don't know how the Pen Tool works, please visit YouTube to learn it.
place the connection points and a line where the texture meets outline. Don't worry that trimming is not at it's place.
Attention - work only on one side of the pad!
Now you will create the shape of trimming. If you don't know how the Pen Tool works, please visit YouTube to learn it.
place the connection points and a line where the texture meets outline. Don't worry that trimming is not at it's place.
Attention - work only on one side of the pad!
Now simply click on the first point you have put so the trimming will connect.
My trimming works really good, but if something went wrong and your is not where it should be, you can play with a tools that will move your trimming.
When you are done, go to stroke color and set it to grey. I use 35%-40% grey.


33.
The only thing to do now is to copy the left side trimming to the other.
First you need to do is to right click on the layer of your trimming and Rasterize it.
Remove the connection line that is useless by simply ereasing it with Erease tool.
The only thing to do now is to copy the left side trimming to the other.
First you need to do is to right click on the layer of your trimming and Rasterize it.
Remove the connection line that is useless by simply ereasing it with Erease tool.
When you are done, select all layer, copy and paste it to a new file. You need to do the same as with copying the texture.
Flip image verticaly. Copy and paste to "Multiplier.png" and move it to right place on the top side of your pad.
Flip image verticaly. Copy and paste to "Multiplier.png" and move it to right place on the top side of your pad.

34.
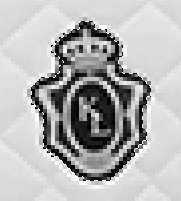
Now I will show you how to prepare your saddle pad for adding a logo.
Go back to original pad picture and using any selection tool select logo. It's up to you if you want logo to be desaturated or in color. I choose mine in black and white. Copy selection.
Now I will show you how to prepare your saddle pad for adding a logo.
Go back to original pad picture and using any selection tool select logo. It's up to you if you want logo to be desaturated or in color. I choose mine in black and white. Copy selection.

35.
Paste logo to "Multiplier.png". Use Free Transform Tool (CTRL + T) with SHIFT to change the size and move it to a place where you want it to be.
Paste logo to "Multiplier.png". Use Free Transform Tool (CTRL + T) with SHIFT to change the size and move it to a place where you want it to be.

36.
If logo has unselected itself, choose Magic Wand Tool (W) and click anywhere next to logo so everything exept it will be selected.
If logo has unselected itself, choose Magic Wand Tool (W) and click anywhere next to logo so everything exept it will be selected.

Inverse selection by SHIFT + CTRL + I or Select > Inverse. Now logo is selected.


37.
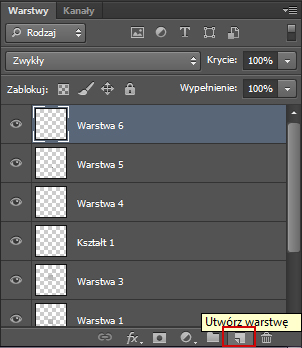
Now look at layer window again. Add new layer by clicking the paper icon at the bottom.
Now look at layer window again. Add new layer by clicking the paper icon at the bottom.

38.
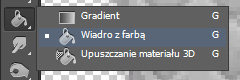
From the tool menu choose Paint Bucket (G)
From the tool menu choose Paint Bucket (G)

Choose not too dark and not too bright shade of grey. The one I used is #bababa.
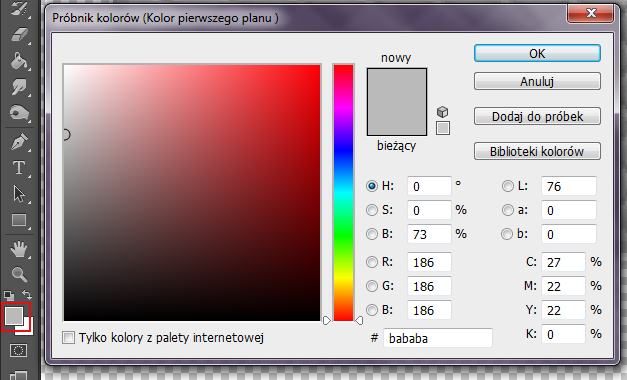
Paint the selection of your logo.

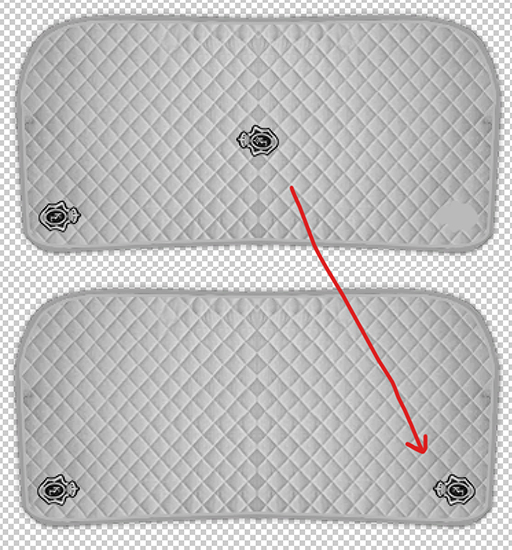
39.
Now select all, copy and paste to a new file. You need to do the same as with trimming and texture, to copy your base for logo to right side of the pad. Again flip your image vertically.
Now select all, copy and paste to a new file. You need to do the same as with trimming and texture, to copy your base for logo to right side of the pad. Again flip your image vertically.
Copy and paste to "Multiplier.png". Move it to the right place.

40.
You are done with preparing your saddle pad for adding a logo. Save your project in PSD file so you will save all layers.
Now you need to rotate your pad to original position.
Choose Image > Image Rotation > Rotate right 90
You are done with preparing your saddle pad for adding a logo. Save your project in PSD file so you will save all layers.
Now you need to rotate your pad to original position.
Choose Image > Image Rotation > Rotate right 90

41.
Let's save our project. Use CTRL + SHIFT + E to merge all layers to one.
Let's save our project. Use CTRL + SHIFT + E to merge all layers to one.
Click File > Save as and name your file "Multiplier2.png". Be sure you save your image in PNG extension!
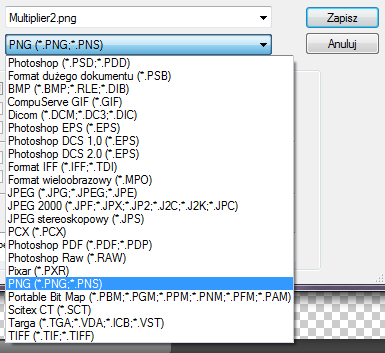
If any pop-up showed up just click OK.

42.
Great job! Now you need to go back to TSR Workshop.
Double click Mask layer and then click "Export". Save it as "Mask.png". Be sure to save it in PNG extension!
Great job! Now you need to go back to TSR Workshop.
Double click Mask layer and then click "Export". Save it as "Mask.png". Be sure to save it in PNG extension!
Now a bit of theory. You already know that Mask layer defines the colors of your pad in game. Each color defines one color chanel. All graphic designs, not only in the workshop, are characterized by a range of colors, according to which the computer converts the colors. The most common is RGB (RED / GREEN / BLUE). We, instead of green, can use purple.

43.
If you have closed "Miltiplier.png" go to your folder and open the project in PSD (the one with saved layers).
Also open "Mask.png". Select all, copy and paste it in "Multiplier.PSD".
Now look at the layer window. You need to find two layers that contain left and right side trimming.
Ffirst click the eye icon next to red mask layer. It will become invisible.

To find two layers with trimming easily, simply click eye icons of each layer and look which part of your image disappears.
When you find both select one and hold CTRL, then select the second one.
When you find both select one and hold CTRL, then select the second one.
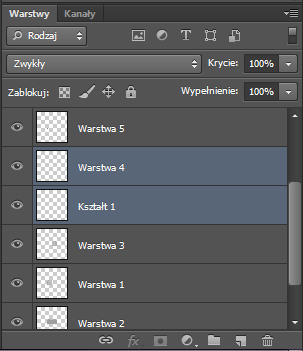
Right click one of them and select "Merge layers". Now they will marge to only one.

Now grab the layer with left mouse button, hold, and move up to the top of the list.
Make the red layer visible again by clicking the little square where eye icon was.
Your image will look like this one now.

44.
Grab the Eyedropper Tool (I).
Grab the Eyedropper Tool (I).

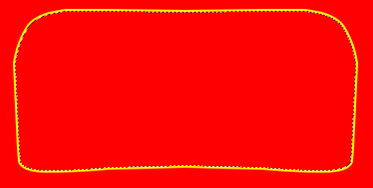
Select the yellow (#ffff00) color of the trimming of "Mask" layer.
Now click little arrows next to the color section to make yellow the background color.
Now click little arrows next to the color section to make yellow the background color.

Now use Eyedropper Tool (I) again and select the red color from "Mask" layer.
Your color selections will look like this.
Your color selections will look like this.


45.
Now grab the Brush Tool (B).
Now grab the Brush Tool (B).
From the top menu choose simple round brush, set its size to 30 and Hardness to 100%.
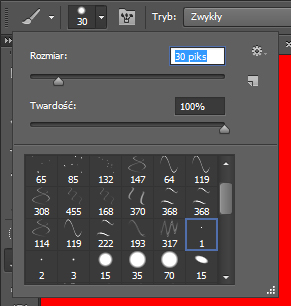
Now make sure that "Mask" layer is selected and brush over the yellow lines.

46.
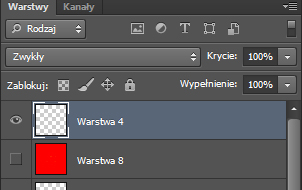
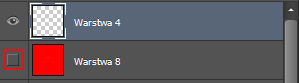
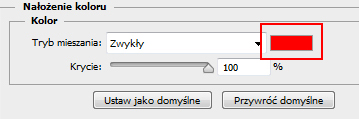
Now select the top layer with trimming. Right click on it and select Blending options - usually it's firsat on the list.
From list on the left choose "Color overlay". Make sure it's selected by a check sign.
Now select the top layer with trimming. Right click on it and select Blending options - usually it's firsat on the list.
From list on the left choose "Color overlay". Make sure it's selected by a check sign.
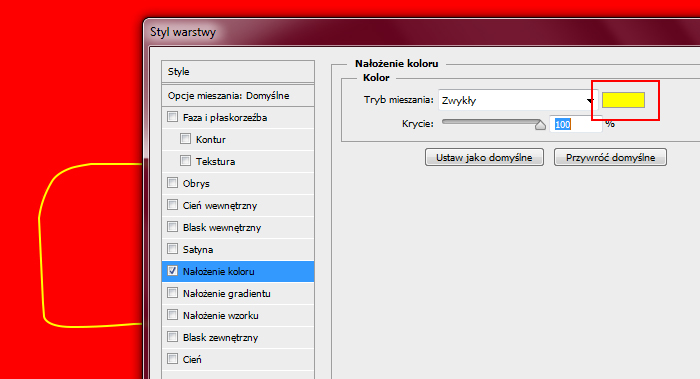
Now click on the red rectangle.
You will see a pop-up window with a color selections. When you move your mose away you'll see that you have Eyedropper Tool to choose custom color. Move your mouse over left side to click the yellow color from the tools menu.

You will see how your trimming changed from grey to yellow and selected color in Bleding options window is yellow. Click OK.

47.
If you want your pad to have three color channels, you need to first think of what would be the third colored area. I want mine to have the outter trimming be separately recolorable.
Let's do it. Click the red color on the left tools menu.
If you want your pad to have three color channels, you need to first think of what would be the third colored area. I want mine to have the outter trimming be separately recolorable.
Let's do it. Click the red color on the left tools menu.

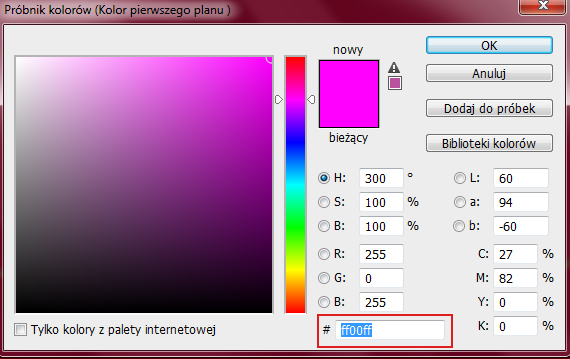
Now you need to manually select the color of third channel. Type # ff00ff to where it's selected at the bottom picture.

48.
Adding purple will be very easy in my project, because the third color is like a border. Select Magic Wand Tool (W).
Adding purple will be very easy in my project, because the third color is like a border. Select Magic Wand Tool (W).

Now from the layers window on the right select the yellow trimming layer. Then click with Wand Tool inside the trimming.
Inverse selection - to remind, it could be done by clicking CTRL + SHIFT + I or Select > Inverse selection. Now everything around the middle area is selected. Grab Paint Bucket (G).
Select Mask layer again.

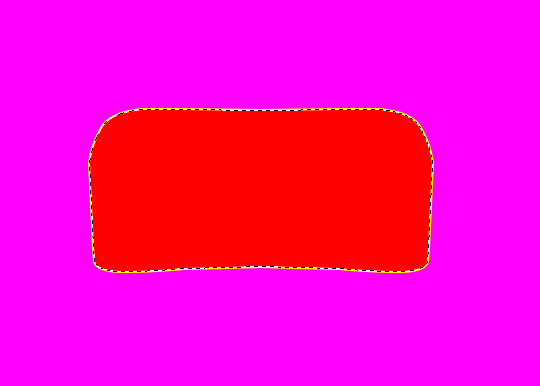
When purple color is already your main color, click anywhere on the screen. The selected area will fill with purple.

49.
You are ready to save the file. First you need to merge layers. Click CTRL + SHIFT + E to marge all layers. You will se only one on the right list. Click CTRL + D to deselect everything.
You are ready to save the file. First you need to merge layers. Click CTRL + SHIFT + E to marge all layers. You will se only one on the right list. Click CTRL + D to deselect everything.

Go to File > Save as and name your file "Mask2.png". Be sure again to choose PNG extension!

WARNING! Close the file WITHOUT SAVING! If you save changes, you will loose all progress!

50.
Now we can do the logo - Overlay layer.
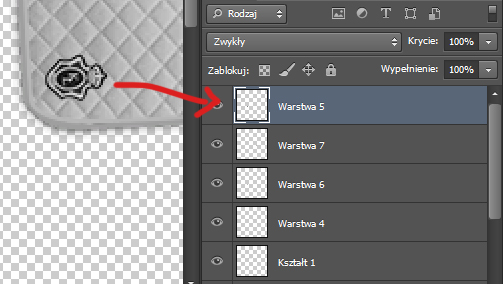
Open Multiplier.PSD file again. Look at layers window at right and find a logo image. It's hidden below one of the grey logo bases. Find it and move it to the top of the list by grabbing.
Now we can do the logo - Overlay layer.
Open Multiplier.PSD file again. Look at layers window at right and find a logo image. It's hidden below one of the grey logo bases. Find it and move it to the top of the list by grabbing.
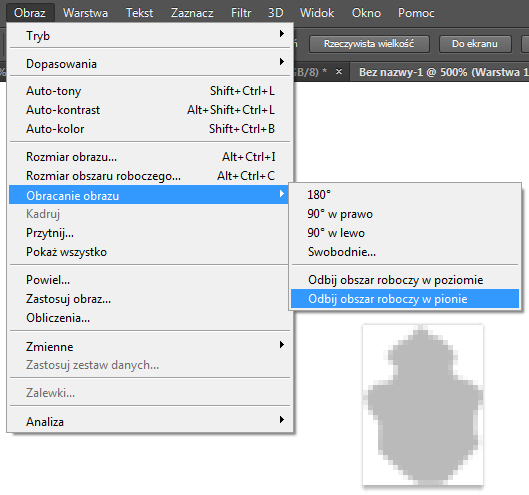
Select all (CTRL + A), copy and paste to a new file. You need to flip your image horizontal.
Go to Image > Image rotation > Flip horizontal
Go to Image > Image rotation > Flip horizontal
Copy image and paste it back to Muliplier.PSD file. Then move it to the other side, where grey base is.
Select with control two top layers - those that contain left logo and right logo.
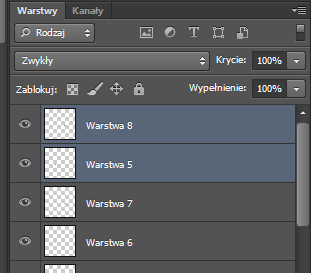
Right click any of them and choose "Merge layers". They will merge to one layer.
Next you need to make invisible all layers but the one with logo. Click eye icons of every signle layer, but leave the top one.
Next you need to make invisible all layers but the one with logo. Click eye icons of every signle layer, but leave the top one.
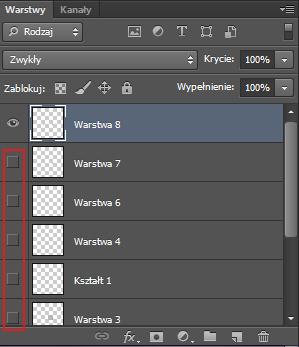
As you can see everything disappeared. The only thing left is our logo.
Go to File > Save as and save your image as "Overlay.png". Again be sure to save it as PNG!

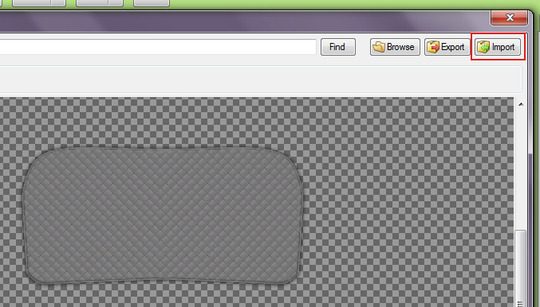
51.
Ufff, we are done! Now you need to edit your project in TSR Workshop.
Go back to TSRW. Double click Multiplier layer to open window. There click "Import".
Ufff, we are done! Now you need to edit your project in TSR Workshop.
Go back to TSRW. Double click Multiplier layer to open window. There click "Import".
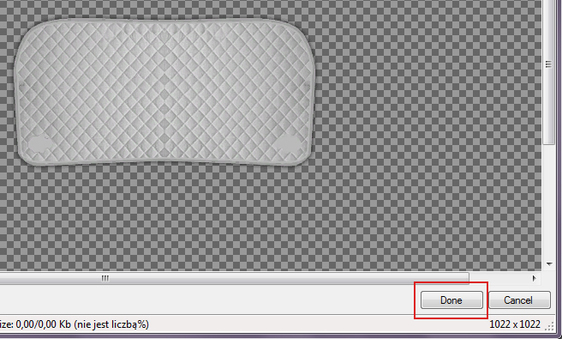
From your destination folder choose "Multiplier2.png" and select "Open".
You will se an Import bitmap. Make sure to have same things selected as I do.
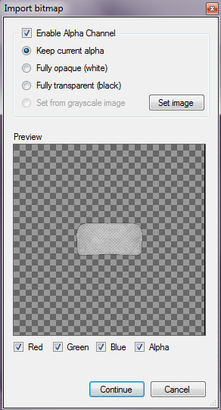
Click "Continue". Your project has been loaded, so click "Done".
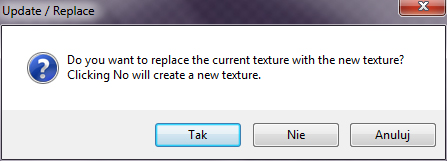
Each time you change anything you get a pop-up asking you if you want to replace current things to new ones. You work with only one object so it doesn't matter. But if you create two or three pads, sometimes with different design, in one file, be sure to click NO to avoid destroying your work. For now it doesn't matter which one you choose.

52.
Do the same with Overlay and Mask layers.
Import Overlay.png to overlay and Mask2.png to Mask layer.
Do the same with Overlay and Mask layers.
Import Overlay.png to overlay and Mask2.png to Mask layer.

53.
Now let's move to default coloring our pad.
Scroll down right panel to Patterns section. Pattern A is red color of your Mask, Pattern B is yellow and Pattern C is purple.
Now let's move to default coloring our pad.
Scroll down right panel to Patterns section. Pattern A is red color of your Mask, Pattern B is yellow and Pattern C is purple.
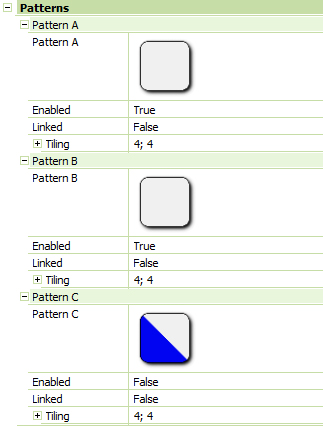
If you create a three-channel pad you need to enable third color (third pattern).
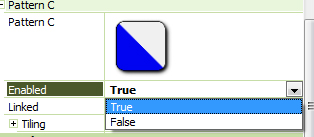
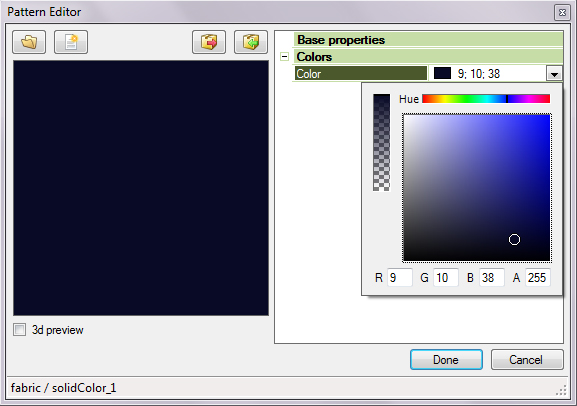
Now it's up to you what colors you choose. Those colors will show up in CAS when selecting your pad. To choose color, double click one of the patterns. Then click little arrow and choose color. Do the same with two other patterns.

54.
After you chose the default colors of your pad, go to File > Save as and name your pad however you like.
You don't save your pad yet, you save the project to have it backup-ed. It will save in .wrk extension.
After you chose the default colors of your pad, go to File > Save as and name your pad however you like.
You don't save your pad yet, you save the project to have it backup-ed. It will save in .wrk extension.

55.
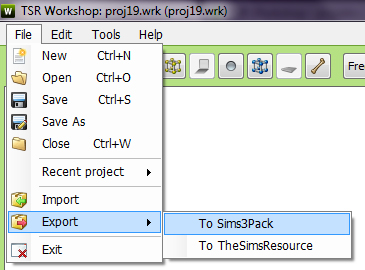
Now it's time to export your project. Go to File > Export > To Sims3Pack
Now it's time to export your project. Go to File > Export > To Sims3Pack
You are done! I hope this tutorial help someone with creating her/his own pad :-)
If there is something missing, something is hard to understand or if I made any letter mistakes, please contact me at [email protected]
Have a nice workshopping!
If there is something missing, something is hard to understand or if I made any letter mistakes, please contact me at [email protected]
Have a nice workshopping!