1.
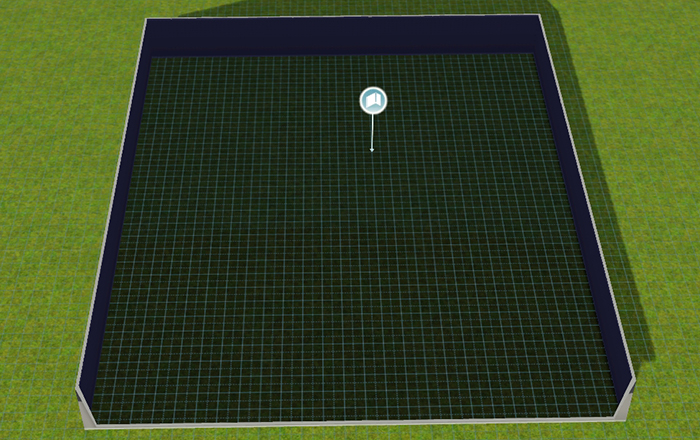
Build a simple room. It must be big enough to let you easy change angles and move backward with TAB picture mode.
Build a simple room. It must be big enough to let you easy change angles and move backward with TAB picture mode.

2.
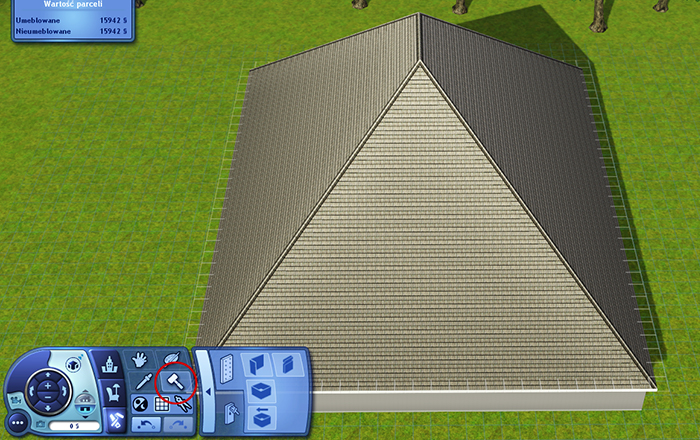
Remove the roof. It's not required, however I hate it being there.
Remove the roof. It's not required, however I hate it being there.

3.
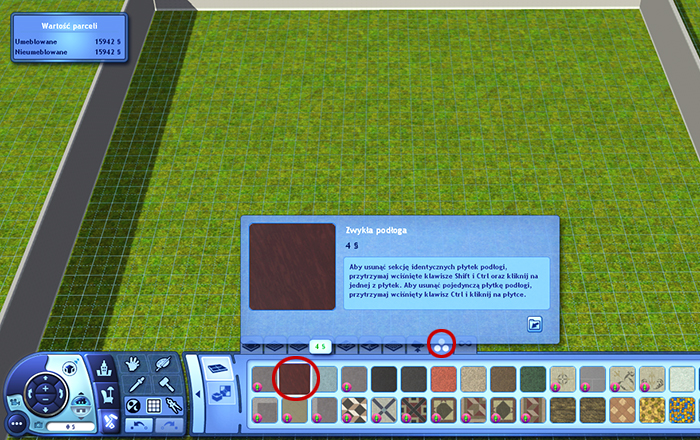
Go to first floor. Now we have to put the floor and walls. I recommend using the one found in Miscellanous (second or first position in the list), because it can be completely recolored to any other texture withouth any add-ons.
It's called something like "Basic floor" and has a red thumbnail.
Go to first floor. Now we have to put the floor and walls. I recommend using the one found in Miscellanous (second or first position in the list), because it can be completely recolored to any other texture withouth any add-ons.
It's called something like "Basic floor" and has a red thumbnail.
Do exactly the same thing with walls. I choose the one from Paint category.
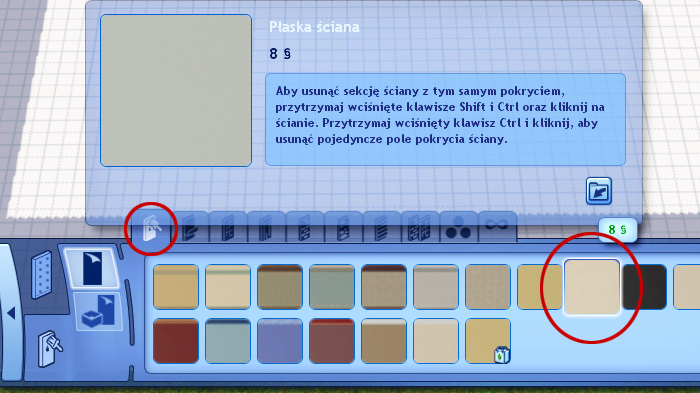
Change its color to whatever you need. I will paint my studio in white.

4.
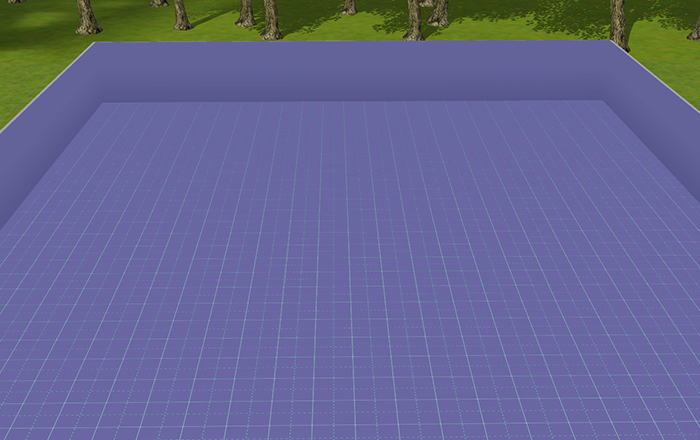
If you removed the roof, use floor tiles to do a ceiling. We have to cut the outdoor lighting completely from our studio.
Remember, that ceiling can be colored from the bottom of a tile.
If you removed the roof, use floor tiles to do a ceiling. We have to cut the outdoor lighting completely from our studio.
Remember, that ceiling can be colored from the bottom of a tile.

5.
Now open cheat console and write in this order:
testingcheatsenabled true
buydebug on
The order is important, because the second one will work only if testingcheatsenabled is turned on.
Now open cheat console and write in this order:
testingcheatsenabled true
buydebug on
The order is important, because the second one will work only if testingcheatsenabled is turned on.

6.
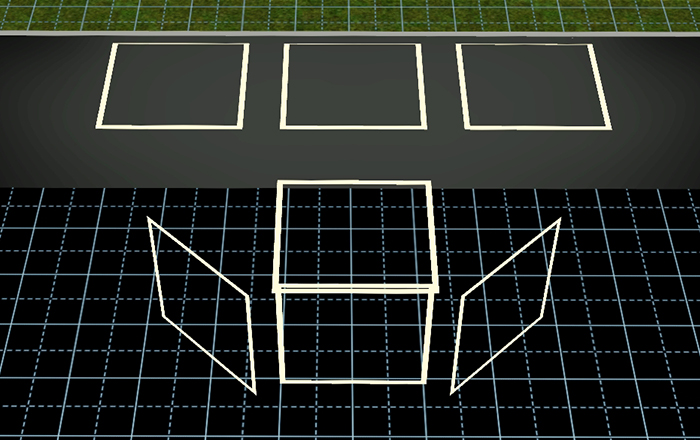
Go to furniture. Sort it by type. You will notice a question mark above your panel, click it.
Go to Miscellaneous tab and search for square lights (thumbnail barely shows anything, because they are white).
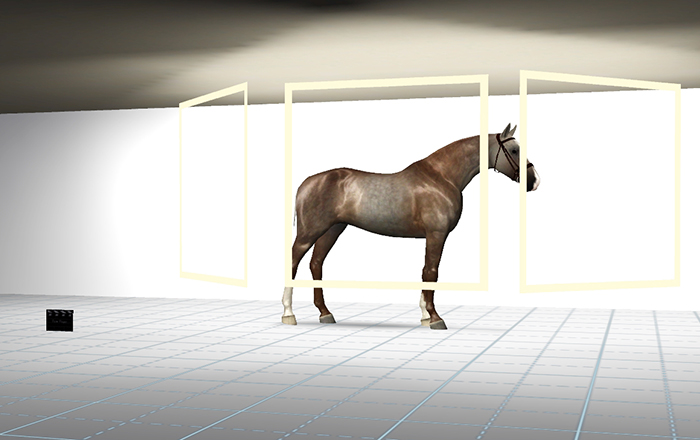
You have a lot of lights to choose from. There are ceiling lights and wall lights in different size. I got used to using 2x2 ceiling lights and 2x2 wall lights.
This is how I place them, however you can play with them as you like to have different effects. Eg. if you remove ceiling light you will reach an effect of a spotlight on your object/sim/horse.
I have changed color to black to easily see the combination.
Go to furniture. Sort it by type. You will notice a question mark above your panel, click it.
Go to Miscellaneous tab and search for square lights (thumbnail barely shows anything, because they are white).
You have a lot of lights to choose from. There are ceiling lights and wall lights in different size. I got used to using 2x2 ceiling lights and 2x2 wall lights.
This is how I place them, however you can play with them as you like to have different effects. Eg. if you remove ceiling light you will reach an effect of a spotlight on your object/sim/horse.
I have changed color to black to easily see the combination.

7.
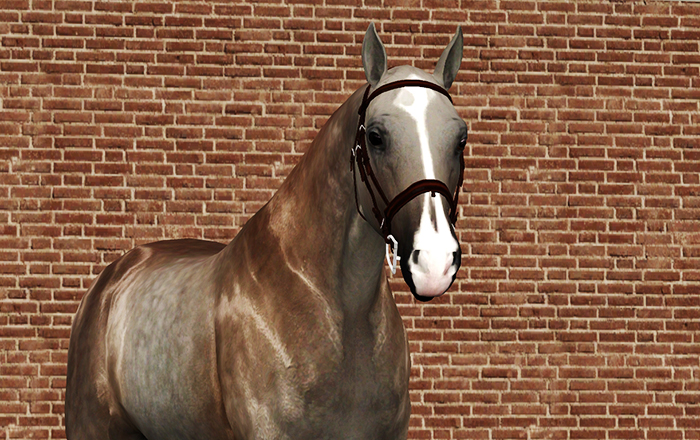
Now it's time to place your object/sim/horse in the light. Pose it first, then move with moveobjects on.
Now it's time to place your object/sim/horse in the light. Pose it first, then move with moveobjects on.

8.
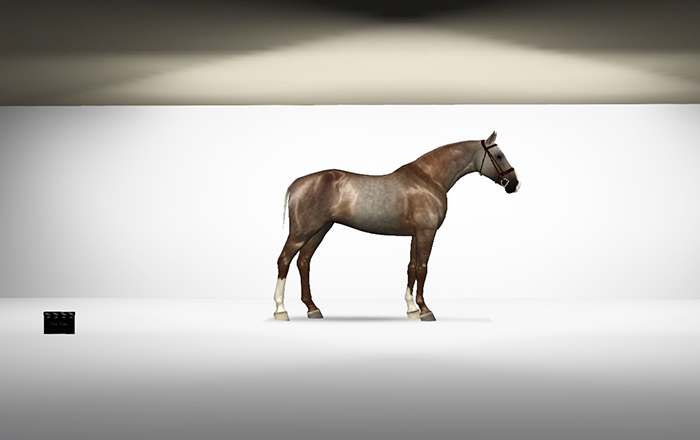
Switch to Life mode. Your lights will dissapear but light will remain visible. This is how the magic works.
Switch to Life mode. Your lights will dissapear but light will remain visible. This is how the magic works.

9.
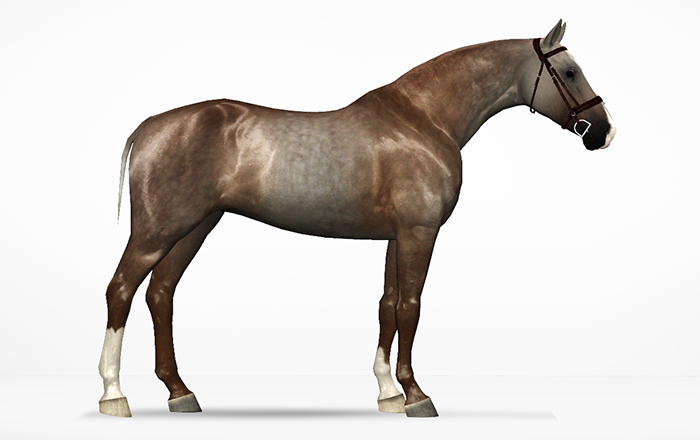
Click TAB to enter photographer mode. Now it's up to you.
Zoom in, zoom out, change angles.
Click TAB to enter photographer mode. Now it's up to you.
Zoom in, zoom out, change angles.

10.
You can easily change background color, light, and model's pose to get everything you like.
You can easily change background color, light, and model's pose to get everything you like.